
REvolution 3 products - Assembling and caring for your table tennis paddle
First published on Tuesday, September 13, 2022
Last updated on Wednesday, November 2, 2022
by ThePongProfessor
REvolution 3 is a brand that specializes in products used to assemble, clean, and maintain your table tennis paddle. Thus, REvolution 3 offers lacquers/varnishes, glues, rollers, presses, scissors, and cleaners, all of which I am reviewing herein.
Sealing the blade
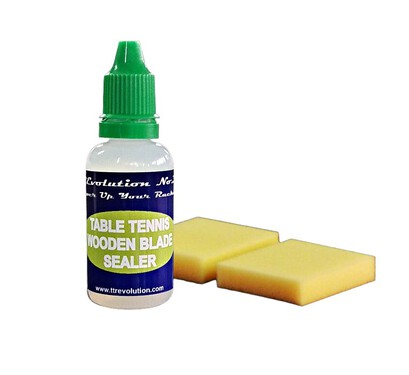
The REvolution 3 Table Tennis Wooden Blade Sealer is designed to protect and extend the useful life of your blade. The ITTF-mandated switch to water-based glues in 2008 (more on that later) motivated the development of products that protect blades from repeated exposure to moisture as this can result in a softening and splintering of the wooden plies when rubbers are removed. This is a particularly important consideration if you use a strong glue to attach rubbers to your blade and/or if you - like me - change rubbers very often. In addition to potential physical damage to an unsealed blade, excessive moisture can also change the playing properties of the blade, typically resulting in a softer feeling with time as the wooden veneers can absorb considerable amounts of moisture from water-based glue, a humid environment, and/or sweat. The latter can also impact the grippiness of the handle and even lead to minor shifts in the center of gravity due to the added weight from the moisture.
Your local home building store likely carries a plethora of products for the treatment of different wood types. Knowing which one to use to realize a desirable outcome without affecting the playing properties of the blade, is an art and not something that I would be willing to risk with an expensive blade. The REvolution 3 Table Tennis Wooden Blade Sealer is a thin, water-based lacquer/varnish suitable for table tennis blades that promises not to be altering the playing characteristics. The sealer comes in a 30 mL transparent bottle that is packaged in a simple ziplock plastic bag along with two sponges (5 x 4 cm) that can be used as such or be cut up into smaller pieces and used in the application process. The sealer is slightly cloudy and has a faint lemony color.
Testing protocol
I applied two thin layers of the product on one side of a gently used untreated limba-based test blade, whilst leaving the other side untreated. Following the application of the first layer, I let the blade dry at room temperature for ~2 hours (dry to the touch after ~30 min), before applying a second thin layer of the sealer. I let the blade dry overnight, and then attached two identical short pips rubbers on the treated and untreated playing surfaces, using the REvolution 3 glue (three layers for rubber, one for blade), roller, and racket press (see below). I then used the paddle in mixed BH warm-up drills to tease out any differences in playing characteristics. After five days, I removed the rubbers from the blade to determine if there are any differences in the ease of removal.
Impressions
It was easy to apply and distribute the sealer with the accompanying sponges. The product seems to penetrate slightly into the wood grain but also remains on top of the outer ply as a non-sticky, clear film that serves as a moisture-resistant barrier. The treated playing surface felt smoother than the untreated surface. Whilst assembling the paddle, I was able to use less glue on the treated side of the blade than on the untreated side. Also, the glue was easier to distribute. The differences in playing properties are very minimal. The feeling was a tiny bit sharper on the treated side, but this difference might equally well arise from small differences in the sponge hardness of the test rubbers. I strongly doubt that most players will feel any difference. Rubbers were markedly easier to remove from the treated surface vis-a-vis the untreated surface. Moreover, far less glue residue remained on the treated surface following rubber removal compared to the untreated surface. I fully expected that the treated side will be far less prone to splintering. Bonus tip: Preferably, you will want to apply this product on a brand-new blade (provided it hasn't already been treated by the manufacturer) as it will have a pristinely clean surface. If you want to apply this product on a used blade, you will need to make sure to remove any residual glue and even consider sanding the surface very gently with fine-grit sandpaper before applying the sealer.
Conclusion
The REvolution 3 Table Tennis Wooden Blade Sealer is a no-brainer blade maintenance product. It is inexpensive, economical in use, easy to use, protects your blade, and does not significantly alter the playing characteristics of the blade.
Gluing on the rubber
In 2008, the ITTF banned the use of so-called speed-glues containing volatile organic compounds (VOCs) as they had a pungent smell and posed a health risk. An ulterior motive of the ban was to slow the game down and make it more spectator friendly, thereby increasing the commercial potential of the sport. At the time, many players bemoaned this step as freshly speed-glued rubbers produced a strong catapult effect stemming from the bursting of gas bubbles, which improves the speed, spin, and feeling of the rubber. Moreover, a characteristic high-pitched sound is produced upon proper stroke execution, which serves as important auditory feedback. VOC-containing glues were replaced with "greener" water-based glues. Unlike VOC-based speed glues, water-based glues offer minimal - if any - performance enhancement of the rubbers. Nonetheless, there are considerable differences between water-based glues, mostly with respect to their viscosity, adhesive strength, and smell.
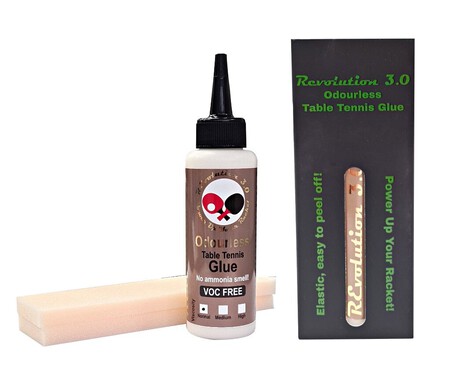
REvolution 3 offers two VOC-free glues, i.e., the REvolution 3.0 table tennis glue and the REvolution 3.0 odourless table tennis glue, which I will refer to as the "regular" and "odorless" glues. Both types of glue are produced in three different viscosities, i.e., normal, medium, and high. Megaspin only carries the thinnest version, i.e., "normal" for the regular glue and all 3 versions for the odorless glue. Both types of glue are described as being highly elastic, easy to apply, easy to peel off, resistant to freeze-thaw cycles, and self-levelling thus ensuring a perfectly smooth glue layer. Additionally, the odorless version promises to be free of ammonia smell. Both types of glue come in 100 mL plastic bottles that are packaged inside a small black cardboard box along with two rectangular sponges (length x width: 15.5 x 4 cm). According to Megaspin, there actually is 110 mL of glue in the regular bottle. Key features of the glues are listed on the box in red and white font (regular) and green and white font (odorless). One noticeable difference in the descriptive text on the boxes is that the odorless glue is recommended for long pimple rubbers. The bottles are adorned with adhesive stickers (regular: red, odorless: olive-green), which list a series of detailed instructions.
Testing protocol
I tested each of the glues using two identical sheets of a well-used short pimpled rubber (prior glue layers were removed) that were attached to the same untreated blade. I applied a first thin glue layer on the sponge side of the rubbers - using the provided sponge to distribute the glue - and let the glue dry at room temperature for roughly 15 min, during which it turned from a milky-white liquid to a transparent film. I repeated this process twice more, for a total of three layers (note: two layers are sufficient for good adhesion; I wanted to provoke a difference in playing properties). I applied one thin layer on the blade and let the layers airdry. It is possible to speed up the drying process by using a hair dryer. I then attached the rubbers to the blade using the Revolution 3 roller and racket press overnight (see below). I used this paddle to do mixed BH warm-up drills to see if there are any differences in the playing characteristics between the two glues. Following practice, I removed the rubbers and reassembled the paddle again as described above (i.e., reglued without prior glue removal) to re-test the playing properties and build up a thicker glue layer.
Impressions
Both glue types are very runny and easy to distribute evenly. Indeed, as advertised, the regular version has a distinct - but not pungent - whiff of ammonia, whereas the odorless version doesn’t and instead has a somewhat musty smell. The regular version might be drying minimally faster but I doubt you will note a difference. I was unable to detect any significant difference in the playing properties of the rubbers attached with the two different glues - the sheet attached with the regular glue might have felt minimally softer, but this difference could equally well be due to sheet-to-sheet variations. I also did not any differences in the strength of adhesion between the two glue types. While I didn’t attempt to remove the glue from sheets on this occasion, I know from past experiences that the regular glue layers are supremely easy to remove with no or minimal damage to the sponge (more damage can occur when you are trying to completely remove the glue layers for a second or third time). I have no reason to suspect that the odorless glue will behave differently.
Conclusion
I have used the regular REvolution 3 glue for many years. It does what it needs to do very well. It is easy to apply, it dries quickly, it does not change the playing properties, and it is phenomenally easy to remove thicker glue layers (>8-9 layers) with no or minimal damage to the rubber sponge, especially when removing glue from harder-sponged rubbers. I routinely use two layers on the sponge to ensure full adhesion, especially when attaching brand-new large-pored rubbers as they “drink” more glue in the initial application. As a chemist, I don’t mind the smell of ammonia which is noticeable but not pungent. In my opinion, the odorless version is indistinguishable from the regular glue, except for lacking the smell. If you are bothered by the ammonia smell, this is the glue for you.
Sidenote
I have used the regular glue in medium viscosity. It is much thicker and results in stronger adhesion. It dries more quickly and unevenly and is a little more difficult to remove from the sponge, especially if the rubber has large pores.
Pro-tip
- pre-moisten the provided sponge with a little bit of warm water and squeeze out any excess water. This will reduce the amount of absorbed and unused glue in the sponge.
- You can reuse the provided sponge several times by rinsing out any absorbed unused glue in warm water between each application and the let the sponge air dry. This way, the two provided sponges will last you for the duration of the bottle.
- Make sure to close the screw cap tightly. Otherwise, a little bit of dried-up glue can clog up the nozzle and ruin the glue. If this happens, unscrew the nozzle, and use a paper clip or something similar to remove the glue clog.
Establishing a strong bond between rubber and blade
When assembling your custom paddle, it is important to ensure firm contact between the rubber and the blade, as the rubber otherwise might peel off during play. Obviously, the strength of the glue is key but REvolution 3 has two additional products to assist you towards this end, i.e., the REvolution 3 Assembly Roller and the REvolution 3 Rubber Press.
REvolution 3 Assembly Roller
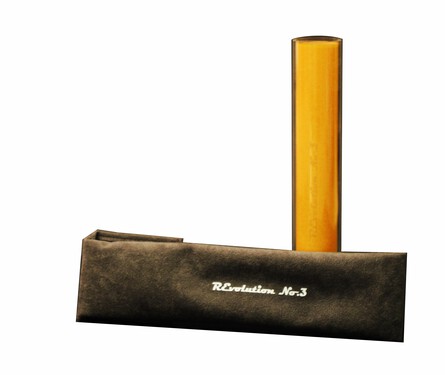
The REvolution 3 Assembly Roller arrives in a blue REvolution 3-branded velour bag. The cylindrical, hollow, and transparent plastic roller is 18 cm wide with an outer diameter of 3 cm. Two thin, non-adhesive, protective plastic sheets are rolled up inside the tube, presumably to protect the rubber from dust whilst rolling it onto the blade.
I used the roller throughout these tests, attaching the rubber at the lowest point of the playing surface where it meets the handle, and then carefully rolling the rubber onto the blade in the upward direction using the REvolution 3 Assembly Roller whilst applying gentle and even pressure. The combination of a uniform motion and the roller ensures that no pockets of air are trapped between the rubber and blade, which otherwise may result in the formation of annoying bubbles and a repeat glue job. The roller is sufficiently sturdy to do its job, but you shouldn’t put your full weight on it, as it otherwise might crack. In any event, you don’t want to apply high pressure as the underlying sponge and pimples otherwise might deform.
The roller is easy to use and has the appropriate dimensions. The fact that the roller is transparent is a nice feature as it allows you to see the sheet while working with the roller. Make sure your hands are clean in order to avoid dirt and grime from transferring onto the rubber.
REvolution 3 Rubber Press
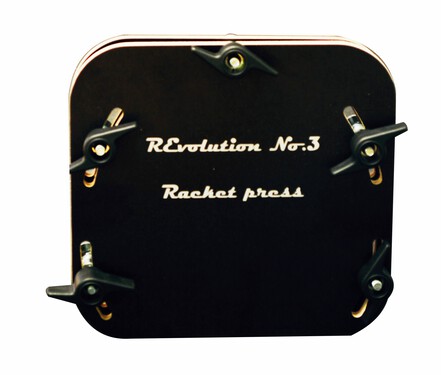
The REvolution 3 Rubber Press arrives in a simple bubble-wrapped plastic bag. No instructions are provided except for an adhesive sticker on the bag urging users always to use protection films (plastic, paper) to protect the rubbers while they are in the press. The press is essentially two pieces of smooth, black, presumably melamine-coated plywood, each being 19 cm wide, 18 cm long, and 9 mm thick. The two plywood pieces are separated by a set of five spring-loaded bolts that sit in five slots that have been carved out in the plywood pieces. The threaded plastic knobs used to tighten the press are large and easy to use. IMPORTANT: Resist the urge that I had to fully disassemble the press as you will have knobs, bolts, springs, and washers all over the place 😊.
How to use the press
Once you have glued the rubber sheets onto the blade (using the glue and roller - see above) and trimmed off excess rubber (using scissors - see below), you should place protective sheets on the rubbers. You should then loosen the knobs of the press just enough for your paddle to be able to slide in between the plywood pieces. Next, you will tighten the knobs evenly to generate a uniform pressure from the press and onto the paddle. You should not overtighten the press to minimize any risk of damaging the rubbers or blade. REvolution 3 recommends that the paddle is left for a few hours or even overnight to maximize the adhesion between the rubbers and blade. The press is easy to use and will give you extra confidence that a strong adhesion between the rubbers and blade has been realized. More detailed written instructions would have been nice.
Trimming off excess rubber
If you are assembling your paddle, you will obviously need to trim off excess rubber, to create a razor-sharp edge that looks good and minimizes crumbling of the rubber. Each player has their favorite tool, including scalpels, knives, and scissors. The first two approaches are associated with a higher inherent risk of bodily injury as a scalpel and knife might slip while you are cutting through a resilient rubber.
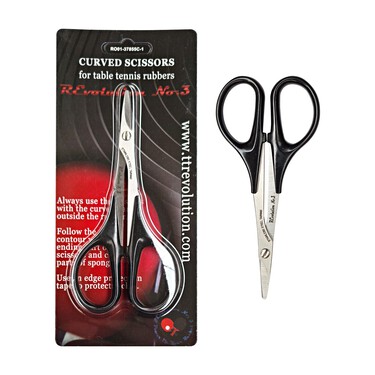
The REvolution 3 Scissors are made in Taiwan using stainless steel and are designed for a lifetime of use. They have a uniquely upward-curved design that promises to give you an accurate cut with minimal effort. The black scissors arrive in molded plastic packaging with a cardboard backing. The backing slides off, providing easy access to the scissors. The pivot point sits very high up on the scissors and the part that does the actual cutting is quite short (<3 cm). The blades are quite long, and the symmetric handle is equally comfortable to hold for right- and left-handers.
The cardboard backing provides the following instructions: “Always use the scissors with the curved part outside the rubber” and “Follow the racket contour with the ending part of the scissors and cut small parts of sponge”. In my opinion, these instructions are not entirely clear. My wife, who does a lot of crafting but doesn’t play table tennis, also found the instructions to be unclear.
To test the scissors, I cut a couple of dead rubbers in half and attached them to an old blade in such a way that a rubber overhang was formed relative to the blade, akin to the situation you would have if you had attached a brand-new rubber to a blade. For context, I should point out that I am quite awful at using scissors, in part because I am a lefty using right-handed scissors. Given the opaque instructions, we initially tried to cut the rubbers in different ways, i.e., with the sponge side facing up and the curve of the scissors facing towards (method 1) or away (method 2) from the blade; or the topsheet-side facing up and the curve of the scissors facing towards (method 3) or away (method 4) from the blade.
Being left-handed, I planned to start on the lower left side (near the handle) and cut in the clockwise direction, whilst my right-handed wife planned to cut from the lower right corner and cut in the counterclockwise direction. Getting access to the starting point proved awkward as the scissors clash into the handle if you want the scissors to follow the contour of the blade. To address this, I made the first cut near the ~8 o’clock position of the paddle (i.e., left side of the paddle), cut the majority of the rubber in a clockwise direction, flipped the paddle along its vertical axis (i.e., lengthwise), and cut the remaining bit of rubber (now with the opposite side of the rubber facing up) in a clockwise direction (right-handers will want to make the first cut near the ~4 o-clock position (i.e., right side of the paddle), cut in the counterclockwise direction, flip the paddle vertically, and cut the remaining rubber in the counterclockwise direction).
Regarding the best way to orient the rubber-to-be-cut, scissors, and blade relative to each other (i.e., methods 1-4), it became obvious that the scissors need to curve away from the blade, as methods 1 and 3 resulted in ugly, ragged edges. Method 4 resulted in very clean edges, but since you cannot see the blade edge, you will have to “feel” your way around the blade’s contour to ensure flush contact with the scissors. Method 2 is the preferred method as it produces a sharp edge and allows you to always see the blade edge. It is important to hold the scissors perfectly parallel with the blade edge to avoid rubbers that have sloping edges. As a control experiment, I tried to use a conventional pair of sharp kitchen scissors (no curved edges). The result was an abomination - ragged, uneven edges.
Thus, the REvolution 3 Scissors are super sharp and an excellent product to trim off excess rubber. However, the instructions are confusing/insufficient. Illustrations would have been helpful. Had I been tasked with writing the instructions, I would have written something along the lines of:
- With the sponge-side of the rubber-to-be-cut facing you, and the scissors curving away from the blade, initiate the cut near the 4 o’clock position and proceed in a counterclockwise direction (left-handers should start near the 8 o’clock position and cut clockwise).
- In order to cut the small piece of remaining rubber that is close to the handle, flip the blade vertically (topsheet-side now facing up), and cut in a counterclockwise direction.
Cleaning and rejuvenating rubbers
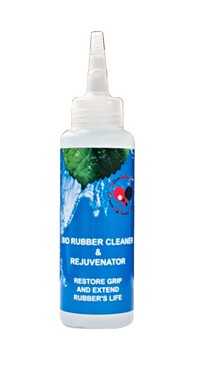
Once you have assembled your custom paddle, you will want to take good care of it to protect your investment and enjoy optimal playing properties. A key step towards this end is to ensure that your rubbers always are clean, as this maximizes the contact with the ball and spin production, as well as extending the rubber’s useful life. The REvolution 3 Bio Rubber Cleaner & Rejuvenator is a water-based, non-toxic, oil-free, alcohol-free, VOC-free, and non-staining cleaner that is applied to the rubber topsheet to remove dirt, sweat, and grime, and restore grip and tack. The cleaner comes in a 100 mL bottle that has a narrow nozzle and a screwcap. According to Megaspin, there actually is 110 mL of detergent in the bottle. An adhesive blue sticker outlines product details including directions on how to use the cleaner. The directions are simple: add a few drops of the cleaner on the topsheet and gently rub it in using your palm until the surface is dry. It is recommended that you wash your hands subsequently.
I have been using this product for several years and it is an outstanding product. Not only does it clean the topsheet of the rubber very effectively, but it also seems to revert moderate oxidative damage and rejuvenate the topsheet, bringing it back to a like-new condition. For example, Hurricane 3 rubbers tend to get a dull and splotchy look after some time if they are exposed to air, which also tends to reduce their famed tackiness. A couple of drops of this project restores the topsheet to its former glory and tackiness. I also feel that the topsheet becomes slightly more elastic. Keep in mind though, that this product doesn’t rejuvenate a “dead” sponge (an effect that occurs when the factory booster of European-type rubbers has been used up). The cleaner also does an excellent job at cleaning European and Japanese rubbers. I use this cleaner roughly once per week, but you could use it after or before each practice session. The cleaner is VERY economical in use and a bottle will last you for a long time. This is easily one of the best table tennis accessories available on the market.
Final thoughts
REvolution 3 offers an excellent array of products for assembling and cleaning your paddle. I am particularly impressed by the sealer, glue, and cleaner, which offer outstanding performance for value.
Related Links
- REvolution 3 Varnish - 30ml
- REvolution 3 Glue - 110ml
- REvolution 3 Odorless Glue - 100ml
- REvolution 3 Odorless Glue - 500ml
- REvolution 3 Scissors
- REvolution 3 Press
- REvolution 3 Roller
- REvolution 3 Bio Rubber Cleaner & Rejuvenator
About The Author
Patrick "ThePongProfessor" Hrdlicka is a table tennis enthusiast, who was introduced to the sport by his parents at the age of six. He progressed to play in the top national cadet and junior leagues in his native Denmark. With college looming, Patrick quit the sport for nearly twenty years. During this hiatus, he obtained a Ph.D.-degree in chemistry and moved to the US as he accepted a chemistry professor position. Since his return to the sport in 2015, he has been combining his analytical skills with his passion for table tennis by testing and writing about a wide range of table tennis equipment. He is a ~2200-USATT-rated left-handed doubles specialist who counts his 2017 US Open (O40 doubles) and 2018 Portland Open (open doubles) titles and Top-16 finish at the 2018 World's Veteran Championships (40-44 year doubles) among his fondest memories. He has a controlled offensive playing style and currently uses a 7-ply limba/ayous based all-wood blade and DHS Hurricane 3 and driving-type short pips in his FH and BH, respectively.